
Table of Contents
ToggleDiscovering mice in a home triggers an immediate need for solutions. Store-bought traps work fine, but they come with recurring costs and limited reusability. Building a homemade mouse trap offers a practical alternative that costs pennies, uses materials already sitting in most garages or recycling bins, and can be reset indefinitely. These DIY designs aren’t Pinterest crafts, they’re proven methods used by homeowners, farmers, and pest control professionals when commercial options aren’t practical. With basic household items and about 10 minutes of assembly time, anyone can build an effective trap that rivals, and often outperforms, what’s available at the hardware store.
Key Takeaways
- A homemade mouse trap built from common household items costs nearly nothing and outperforms store-bought alternatives while remaining reusable across multiple catches.
- The bucket and ramp design catches multiple mice automatically and resets without intervention, making it ideal for handling active infestations without ongoing replacement costs.
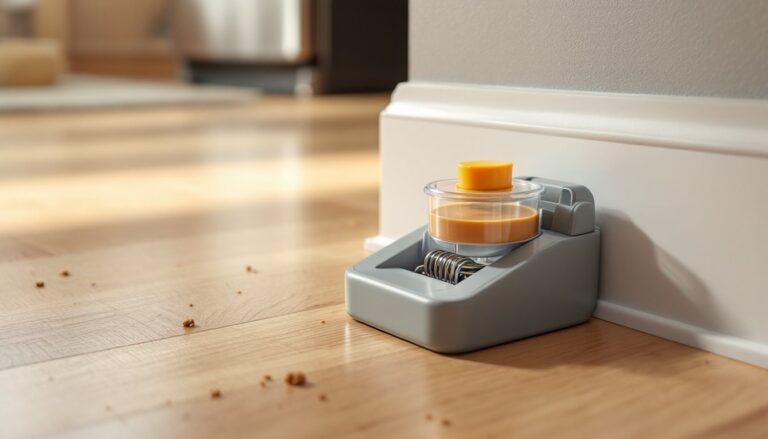
- Peanut butter is the most effective bait due to its high protein content, strong scent, and sticky consistency that prevents mice from grabbing and escaping.
- Proper trap placement along walls where droppings appear—combined with setting traps in the evening when mice are most active—dramatically increases success rates.
- Personal protective equipment, disease prevention, and humane considerations are essential when building and deploying a homemade mouse trap to safely manage rodent control.
- Long-term mouse prevention requires sealing entry points with steel wool and caulk while storing food in sealed containers, addressing the root cause rather than relying on traps alone.
Why Make Your Own Mouse Trap at Home?
Commercial snap traps run $1-3 each and require disposal after a single use. Glue traps cost similar amounts and create messy cleanup scenarios. Live-catch traps range from $8-20 but often fail when mice figure out the trigger mechanism. Homemade versions eliminate these problems entirely.
Cost savings add up quickly when dealing with multiple mice or recurring infestations. A bucket trap uses a 5-gallon bucket most people already own, plus a soda can and wire coat hanger. Total material cost: essentially zero. It catches multiple mice per night without resetting, unlike single-use commercial options that max out at one mouse.
Reusability matters during active infestations. Store-bought snap traps require careful handling to reset, and many people dispose of them after one catch due to the unpleasant cleanup. DIY traps rinse clean and go right back to work. Homeowners dealing with seasonal mouse pressure, common in rural areas when field mice seek shelter before winter, appreciate traps that handle volume without constant trips to the store.
Customization allows adaptation to specific situations. A trap in a basement can be larger and less aesthetically focused than one needed near living spaces. Homemade designs scale up or down based on available materials and the severity of the problem. They also offer better control over humane vs. lethal outcomes, depending on personal preference and local wildlife relocation regulations.
Essential Materials You’ll Need
Most homemade mouse traps require items already in the recycling bin or utility closet. Gather materials before starting assembly, mice don’t wait for hardware store hours.
For the bucket trap:
- 5-gallon bucket (clean paint buckets or food-grade containers work)
- Empty aluminum soda can (12 oz. standard)
- Wire coat hanger or 1/8-inch metal rod (12-14 inches long)
- Scrap wood (1×6 or 1×8, 18-24 inches long) for the ramp
- Peanut butter or other bait
- Wire cutters and needle-nose pliers
For the bottle trap:
- 2-liter plastic soda bottle (empty and clean)
- Cooking oil or vegetable oil
- Bait (peanut butter, chocolate, seeds)
- Utility knife or scissors
- String or wire (optional, for securing)
Optional additions:
- Water (4-6 inches in the bucket for a lethal trap)
- Antifreeze (small amount prevents water from freezing in unheated spaces: note this makes the trap lethal)
- Cardboard or paper towel tube (alternative to soda can)
No specialized tools required. A basic utility knife and pliers handle all cutting and shaping. Many DIYers find these traps easier to build than the simple woodworking projects typically recommended for beginners.
The Bucket and Ramp Mouse Trap
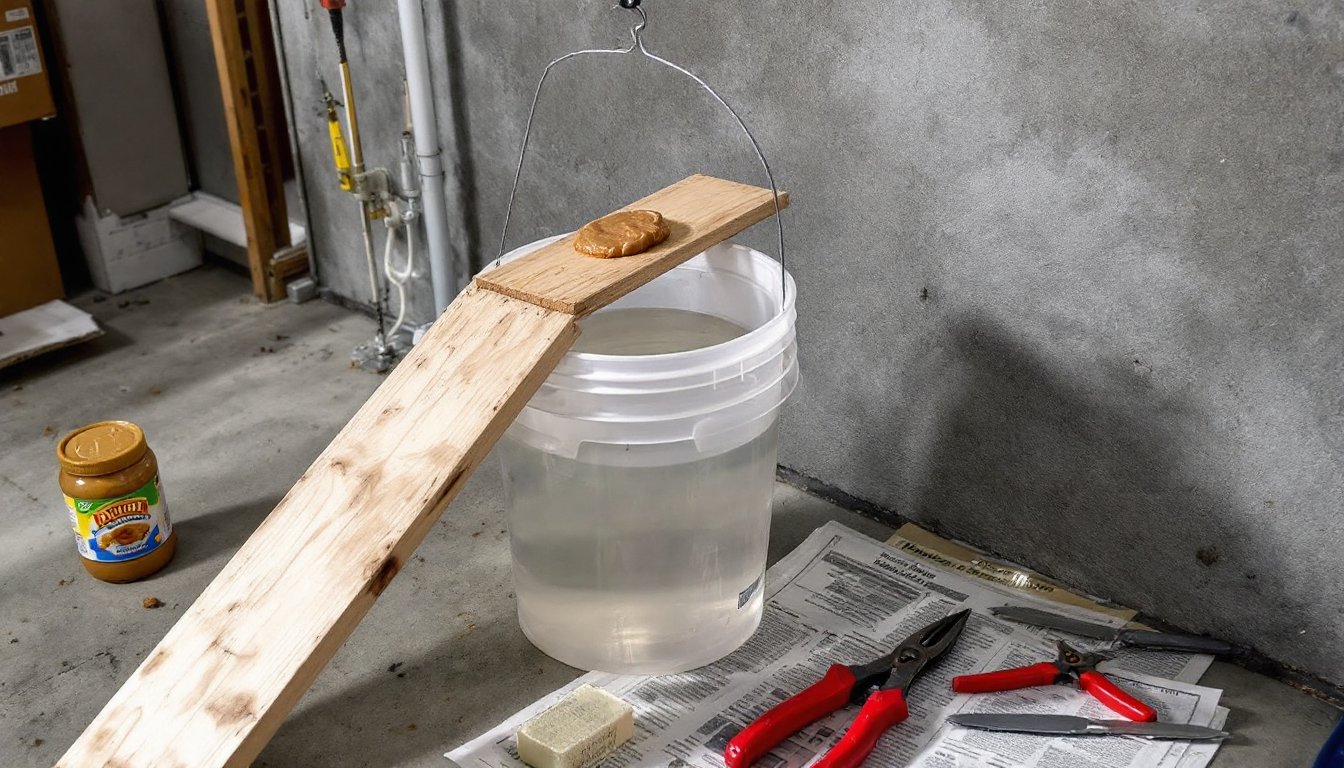
This design catches multiple mice per session and resets automatically. It’s the workhorse of homemade traps and handles everything from single intruders to serious infestations.
The mechanism relies on a spinning cylinder balanced across the bucket opening. Mice climb the ramp, walk onto the cylinder to reach bait, and the cylinder spins under their weight, dropping them into the bucket. The cylinder immediately returns to position, ready for the next mouse.
Step-by-Step Instructions
-
Prepare the aluminum can. Punch or drill a hole through the center of the bottom and top of the can, directly through the existing indentations. The holes should be just large enough for the wire to pass through with minimal friction. The can needs to spin freely.
-
Cut and shape the wire. Using wire cutters, cut a coat hanger to 12-14 inches. Straighten it completely with pliers. This rod will suspend the can across the bucket opening, so measure the bucket diameter and add 2 inches on each side to rest on the rim.
-
Thread the can onto the wire. Push the wire through both holes in the can. The can should spin smoothly along the wire with no binding. If it catches, enlarge the holes slightly or smooth any burrs with sandpaper.
-
Mount the wire across the bucket. Bend small hooks on each end of the wire (about 1/2 inch) to prevent it from sliding off. Rest the wire across the bucket rim, positioning the can in the center. Test the spin, it should rotate with minimal effort.
-
Apply bait to the can. Smear peanut butter around the middle of the can. Use enough that the scent carries, but not so much that mice can eat it without stepping onto the can. A thin, even coating works best.
-
Position the ramp. Lean a piece of scrap wood against the bucket at a 30-45 degree angle, creating a walkway to the rim. Mice easily climb inclines up to 45 degrees. Ensure the ramp is stable, any wobbling will spook cautious mice.
-
Add water if using a lethal setup. Pour 4-6 inches of water into the bucket. This depth prevents mice from jumping out but uses minimal water. Some users add a few inches of antifreeze in unheated garages to prevent freezing, though this requires careful disposal.
-
Place the trap. Position it along walls where droppings indicate mouse travel paths. Mice follow walls due to poor eyesight and rely on their whiskers for navigation. This simple approach mirrors the proven methods shown in many DIY pest control guides.
Check the trap every 12-24 hours. A bucket without water functions as a live trap and requires frequent checks to prevent stress or dehydration. With water, it’s lethal and can operate longer between checks, but local regulations may restrict this method, check wildlife codes before deploying.
The Bottle Mouse Trap Method
The bottle trap works well in tight spaces where a bucket won’t fit, behind appliances, in crawl spaces, or along basement walls with low clearance. It’s a single-catch design but requires almost zero materials and assembles in under five minutes.
Construction process:
-
Cut the bottle. Using a utility knife or scissors, cut a 2-liter bottle approximately one-third of the way from the cap end. The cut should be clean and straight across. This creates two pieces: a funnel-shaped top section and a larger bottom reservoir.
-
Invert the top section. Remove the cap. Flip the top section upside down and insert it into the bottom section, creating a funnel that narrows toward the inside. The neck opening should be 1-1.5 inches in diameter, large enough for a mouse to squeeze through while pursuing bait.
-
Secure the sections. Use tape, wire, or staples to attach the inverted top to the bottom section. The connection doesn’t need to be airtight, just stable enough that a mouse can’t dislodge it.
-
Oil the funnel. Pour a small amount of cooking oil into the funnel and swirl it to coat the inside surface. This prevents mice from climbing back out. The oil eliminates traction on the smooth plastic.
-
Add bait. Place a spoonful of peanut butter, seeds, or chocolate at the bottom of the reservoir section. The bait needs to be visible and aromatic enough to draw mice through the funnel.
-
Position near activity. Set the bottle along walls or in corners where droppings appear. Angle it slightly to make the funnel opening accessible without requiring the mouse to climb.
This design functions as a live trap. Mice enter easily but can’t climb the oiled funnel to escape. Check it daily and release or dispatch captured mice according to local regulations. For additional DIY solutions using common household materials, resourceful homeowners often reference step-by-step project tutorials for creative problem-solving approaches.
The bottle trap won’t handle multiple mice like the bucket design, but it’s ideal for confirming activity in specific areas or targeting a single mouse that’s avoiding other traps.
Best Baits and Placement Tips for Maximum Success
Trap design matters, but bait selection and placement determine actual catch rates. Mice won’t ignore their survival instincts for mediocre bait in a poorly positioned trap.
Bait that works:
- Peanut butter (top choice, high protein, strong smell, sticky consistency prevents grab-and-run)
- Chocolate or Nutella (sweet scents attract mice: works especially well for house mice)
- Bacon grease or sausage bits (protein and fat content appeals to nutritional needs)
- Sunflower seeds or bird seed (effective for deer mice and field mice)
- Nesting material in spring (cotton balls or dryer lint attract pregnant females seeking nesting sites)
Avoid cheese, it’s a cartoon myth. Mice prefer high-calorie foods with strong odors. Cheese dries out quickly and loses scent effectiveness.
Placement strategy:
- Follow the evidence. Place traps where droppings, gnaw marks, or grease smudges indicate travel routes. Fresh droppings are dark and moist: old droppings are gray and crumbly.
- Wall placement. Position traps perpendicular to walls with the entrance facing the wall. Mice travel along edges, not across open floors.
- Multiple trap locations. Set 2-4 traps even if only one mouse is suspected. Mice rarely travel alone, and multiple traps provide data on which areas see the most activity.
- Undisturbed zones. Avoid high-traffic areas. Mice prefer quiet spaces away from human activity, behind appliances, in utility rooms, crawl spaces, or garages.
- Elevation changes. Mice climb easily. Don’t ignore upper shelves, dropped ceilings, or areas near plumbing penetrations where they access wall voids.
Timing considerations:
Set traps in the evening. Mice are nocturnal and most active between dusk and dawn. A trap set at 6 PM has higher success odds than one placed mid-morning.
Refresh bait every 2-3 days if traps aren’t producing. Dried-out peanut butter loses scent effectiveness. Mice rely heavily on smell to locate food sources.
Safety and Humane Considerations
Mouse control involves handling rodents that carry diseases and parasites. Safety protocols aren’t optional.
Personal protective equipment (PPE):
- Disposable gloves when handling traps, bait, or captured mice
- Mask or respirator when cleaning areas with droppings or urine (hantavirus risk in some regions)
- Eye protection if using antifreeze or cleaning chemicals
Never handle live or dead mice with bare hands. Rodents carry leptospirosis, salmonella, and other pathogens transmissible through contact or airborne particles in dried urine.
Humane dispatch and release:
Live traps require a plan for captured mice. Releasing them outdoors near the home results in re-entry within 24-48 hours, mice have strong homing instincts within their territory. Relocation must occur at least 2 miles away, preferably in wooded areas away from other structures. Check local wildlife regulations: some jurisdictions prohibit releasing trapped animals due to disease transmission concerns.
For lethal traps, drowning (bucket with water) is commonly used but debated among pest control professionals. Some consider it inhumane due to the time required. Alternatives include CO2 chambers (dry ice in a sealed container), though these require more setup. If using lethal methods, check traps frequently to minimize suffering time.
Disposal:
Double-bag dead mice in plastic bags and dispose of them in outdoor trash containers. Do not compost or leave them in nature, this attracts scavengers and spreads disease. Clean traps with diluted bleach solution (1 part bleach to 10 parts water) between uses.
Prevention after trapping:
Traps address symptoms, not causes. Seal entry points larger than 1/4 inch using steel wool stuffed into gaps, then covered with caulk or expanding foam. Mice gnaw through foam alone but avoid steel wool. Focus on areas around pipes, vents, door sweeps, and foundation cracks.
Store food in sealed containers (glass or heavy plastic, not cardboard). Eliminate water sources by fixing leaky pipes and removing standing water. Mice need only 1/10 ounce of water daily but prefer consistent sources.
Persistent infestations, defined as catching more than 5-6 mice per week for multiple weeks, may indicate structural issues or nearby nesting sites that require professional assessment. A licensed pest control operator can identify entry points and nesting areas that aren’t obvious to homeowners.